Thoughts on Moving to Spain


Palau de la Musica Catalana

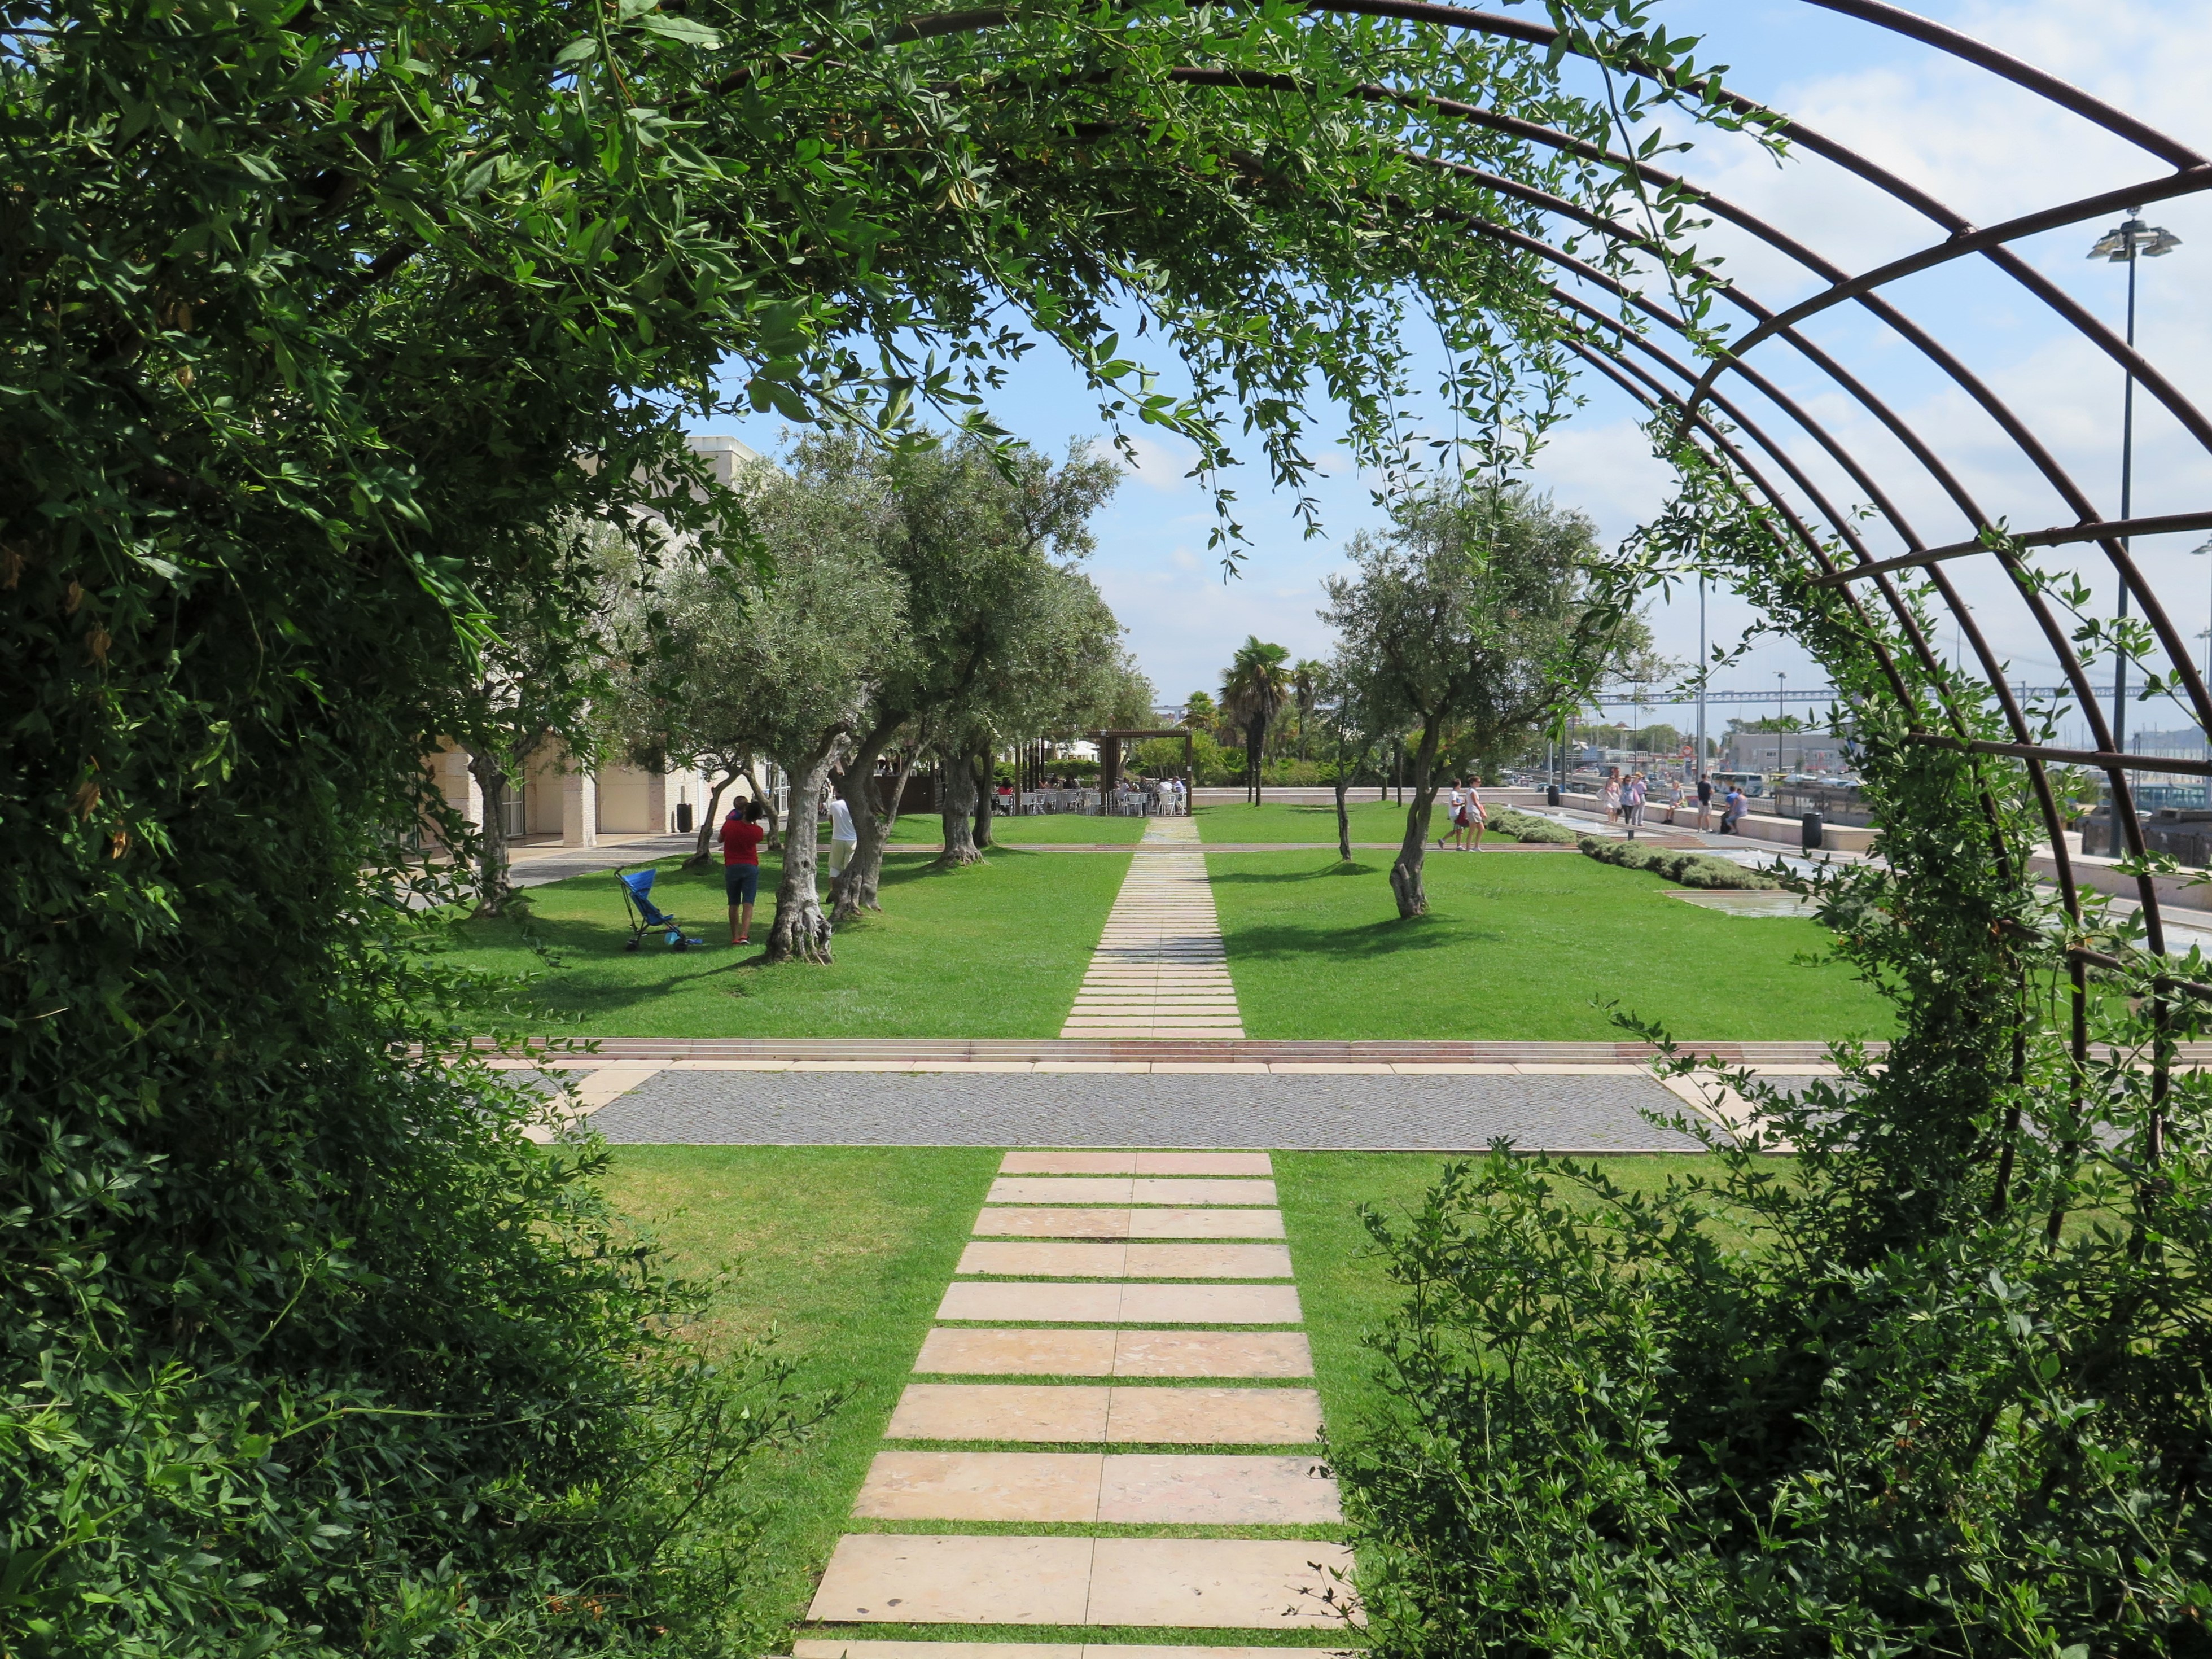
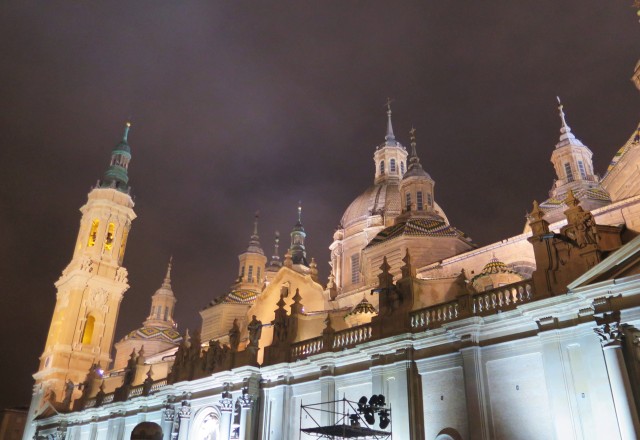
My favorite building interior ever

In six short days, I will be back in Spain, livin’ la vida loca. At least if you consider part-time unemployment in a foreign country and the headstrong following of dreams the crazy life. But I’m getting ahead of myself, what I really want to talk about is how I got here.

Right now I am feeling all kinds of emotions (as I am sure you can appreciate) as I pack 3 relatively small (albeit hefty) suitcases full of items I deem vital for a life abroad. I know I will be gone until Christmas and trying to pack for eight months isn’t actually the hard part – it’s organizing all the miscellaneous items I’m choosing to leave behind that’s proving difficult. How does one say goodbye to 24 years of things? I wish I could say I don’t need material positions, but this is the home I grew up in, the bedroom I carefully decorated, the items that comforted me with their presence and consistency.

Many of my favorite “things” don’t fit my 20 Questions game-like requirements for taking along with me. Is it smaller than a suitcase? Does it weigh less than a pound? Is it practical? If it’s not practical, would I risk it being taken by TSA? Questions of this nature. With these requirements in mind, a jar of moonshine, my friends new puppy, a stockpile of almond paste and various extracts and flours have all been eliminated.

Sure, deciding which clothes stay or go was tricky but this is my third time packing for Spain in the past year and a half, so I have a pretty good idea what I will and will not need. Shoes are a whole different story though, let me tell you. If I take my favorite heels, I’ll be taller than my boyfriend whenever we go out. Or, if I just wear them one night a month for girl’s night, they’re basically getting no usage time so isn’t it better to leave them here? My favorite boots are to die for, but if I come back at Christmas wouldn’t it be more practical to get them then – when I might actually conceive of wearing them in Barcelona’s climate?

Such are the questions that plague my mind every five minutes, along with the equally daunting but much more practical questions about how I will make enough money to cover my phone bill, health insurance, a gym membership (so necessary when you take into account all the jamón and potatoes I eat over there), an eventual apartment, groceries, Zara pocket money, etc., etc. I say that fairly flippantly but in all reality I have a budget drawn up for myself and know exactly how many euros I currently have in my bank account – and I mean down to the penny. I have students lined up and will talk to more friends and relatives of my boyfriend when I arrive about the English lessons they have all been asking me about. I am starting to find freelance writing jobs and all in all I think the money situation is as well in hand as it is for any 20-something-year-old in this day and age.

No, the only thing that is truly cramping my style (and delirious happiness at the prospect of moving to my favorite city in the world) is fear. The crippling, nightmare-ish, huge failure, shit-your-pants kind of fear.

To pinpoint exactly what is causing my sleepless nights would be almost impossible because I’ve been afraid of everything my whole life. Irrational and rational fears both come into play, but I have always been one to forecast the worst possible scenario. By age six I had worked myself up into such a state that I needed therapy to get over my fear of thunderstorms (side note: this did not completely work. I swear my stomach twisting itself into knots can predict the impending arrival of bad weather). I am also afraid of: tornadoes (rational), elevators (irrational?), drowning (even though I know how to swim), suffocation (…how?), bad grades in school, diseases, disappointing my parents, losing someone I love in a spontaneous and unpredictable accident (to be fair, this has happened multiple times in my family, so we will say it is a rational fear), ants, heart attacks (again…how? I am 24), that my friends don’t really like me, leaving home, that kids I am babysitting will choke, that I like being alone, that I am not living up to my potential, and so on and so forth.

Now, I’m sure you’re thinking that most of these are pretty common fear. But my problem isn’t just the fear, it’s the fact that I can’t control the anxiety that racks my body when these fears take hold (which is something else I am afraid of – fear, anxiety and losing control).

Fear is the number one reason I am moving to Spain. Because it is so terrifying to me. I made this big decision, this exciting and potentially disastrous decision, in part because it was so scary and anxiety-inducing to me. I wanted to prove to myself that I could strike out boldly on my own and live to tell the tale. I wanted to quell my own fears of failure and embrace a lifelong dream. I’ve always known the kind of person I wanted to be and that person lives (unrealistically) without fear of tomorrow – only with appreciation for the present. The person I want to be is full of stories, inspiration, and perhaps a glass of wine or two.

The only thing stronger than my fear of failure in a foreign country (which could potentially lead to other fears such as disappointing my parents and not living up to my potential) is my fear of staying in one place forever. It was too easy for me to imagine my life before me: job-searching and living at home, working in my hometown, eventually moving out, finding a better 9-5 desk job, falling in line… Those things are great, but they are not what I have spent my whole life dreaming of. I traveled the world from the comfort of my bed through books and literature, a giant atlas I had, the internet, my imagination – and it was incredible, but it wasn’t enough. Not for me.

I am and have always been a visual person so I know that I need to see places, landscapes, faces, and beauty for myself, to know they exist. I am too easily jealous to let others explore the world for me and accept their second-hand retellings. I am too hungry to not to go and taste every exotic thing I possibly can (fried guinea pig and scorpion skewers spring to mind). I am at once too afraid and too restless to stay, and too stubborn to fail.

So I am going. I am moving to Spain. Everyone I talk to about this (my best friends, acquaintances, the guy at the pharmacy asking why I needed a year’s supply of allergy medicine) thinks it’s incredibly brave that I am leaving because they don’t know the truth. I am not brave. I am many things but brave is not one of them. I am passionate, curious, determined. I am smart, organized, creative, and kind. I’m funny and loyal and occasionally bitchy… But never brave.

My dad says I am jumping off a cliff without so much as checking for a safety net, and I know he has a point. I know he is worried about my health, my diet, my finances, my future. Deep down though, I know he’s wrong, that my safety net is there: my values, my friends and family, my will to succeed, my lust for life. It seems impulsive and stupid but this is the most difficult and thoughtful decision I have ever made. I may be afraid of everything but I am so afraid of losing this opportunity, of letting myself down, of settling, that I am willing to fake brave long enough to jump.

I want to share this journey, share my triumphs and downfalls, my gluten-free meals, my pet peeves, joys and daily thoughts with you.

Almond Biscotti and an Ode to North Carolina Weather

IMG_2318 (2)

Winter storm Jonas has come and gone and for those of you who think a state as far south as North Carolina would get off easy, let me enlighten you. Here in the south there is a dreaded winter phenomenon (which requires stockpiles of toilet paper, gluten and milk) known to locals by its scientific name – Wintry Mix.

Situated smack in the center of the eastern seaboard, our state has four seasons (which I refer to as allergy season, hot & humid hell season, autumn and winter) and occasionally an extreme weather situation like a tornado. The coast and outer banks also stick out far enough to make them good target practice for rogue hurricanes that didn’t follow their hypothesized trajectory. Storms against this smattering of islands that jut out into the ocean earned the area its nickname long ago as the “Graveyard of the Atlantic”.

Moving from our coast to the beautiful mountains (aka the Smokey Mountains and the Blue Ridge Parkway, for example) you will find yourself in the center of the state, also known as the piedmont. The piedmont area and the sand hills of North Carolina include the capital city of Raleigh, famous golf courses and retirement communities, college towns like Chapel Hill, my own industrial-turned-hipster hometown, Durham, a number of pig, corn and tobacco farms, and probably more than a few trailer parks and meth labs less classy than the ones as-seen-on-TV in Breaking Bad. We are a state of great diversity as you can see, and that diversity lends itself to the weather as well. As global warming continues to do very weird things to the outdoor temperatures, snow storms cruise in and cover the suburbs almost as quickly as 70 degree weather comes in to melt it all. And when snow hits the piedmont, our one snowplow just doesn’t quite cut it.

Winter storm Jonas wasn’t nearly as bad in Durham as the meteorologists claimed it would be, and for that we were very fortunate. They predicted up to an inch of ice, which would have been absolutely crippling. Luckily, we only got about 0.2” of ice and almost 2” of sleet in some places. Power outages caused by the ice in other areas of the state accounted for nearly half of the power outages on the east coast thanks to Jonas and while we had electricity, driving on thin ice (haha) simply was not an option for two days (we waited nearly four). So, I did what any normal person would do given the circumstances; drank lots of tea, watched Hallmark movies, and baked.

Being stuck indoors with daily tromps through the snow and ice isn’t nearly as bad as it seems. It happens rarely enough in North Carolina and when it does, for me at least, it is a welcome sort of vacation. The world is silent and covered in white and there is nothing to interrupt your morning coffee or afternoon tea with a perfectly tender and crunchy gluten-free almond biscotti in hand.

I got the second volume of America’s Test Kitchen’s gluten-free cookbook from my father for Christmas and I figured this would be the perfect time to experiment with some of the incredibly thorough and fail-proof recipes. I chose biscotti to start because it seemed a terribly elegant and European cookie to accompany my almost hourly consumption of warm beverages. The biscotti are twice baked; once to cook the dough and twice to crisp the edges just so. Biscotti in general can be a crumbly mess, so it is easy to imagine a gluten-free biscotti being even drier, but this recipe provided the perfect balance and made for a soft center.

IMG_2340 (3)

almond biscotti and cold brew coffee

Ingredients:

  • 2 c. gf flour blend
  • 1 tsp. baking powder
  • ¾ tsp. xanthan gum (I omitted this because I add so much xanthan to my flour blend. If you don’t make your own mix, read the ingredients carefully and decide if you will need to add extra xanthan gum)
  • ½ tsp. salt
  • 1 c. granulated sugar
  • 4 Tbsp. unsalted butter, softened and cut into 4 1-inch pieces
  • 2 large eggs
  • 2 Tbsp. water
  • ½ tsp. almond extract
  • ½ tsp. vanilla extract
  • ¾ c. slivered almonds (the recipe calls for ¾ c. whole almonds toasted and chopped coarsely, but I find slivered untoasted almonds just as good!)


Directions:

  1. Whisk the flour blend, baking powder, xanthan gum (if using), and salt together in medium bowl. Using stand mixer with paddle attachment, beat the sugar and butter until pale and fluffy. Add the eggs, water, almond and vanilla extracts to the butter and sugar and beat another 2-3 minutes until well-incorporated.
  2. On low speed, add the flour mixture and blend until you get a homogenous mixture. Add the almonds and beat to combine or mix in by hand. Cover the bowl and let sit for 30 minutes on the counter (not in fridge).
  3. Heat oven to 350 and line baking sheet with parchment paper. Transfer all of the dough to the parchment paper and with wet hands form a long rectangular/log shape about 12”. Bake 35 minutes, or until just golden brown and cracked on the edges.
  4. Remove biscotti from the oven to cool for 10 minutes and in that time reduce oven temperature to 325 degrees. On a cutting board, slice ½ inch-thick biscottis with a bread knife. Place the cookies flat and space ¼ inch apart on a wire rack set in rimmed baking sheet.
  5. Bake another 35 minutes, or until the biscotti is crisp and golden on both sides – e sure to flip the cookies over halfway through baking. Let them cool before serving and keep up to 3 weeks.
  6. Make tea/brew coffee and enjoy!

Gluten-Free

New Year’s Resolutions and Flourless Peanut Butter Cookies

Just like the rest of the world, when the New Year begins I sit down and think about my new year’s resolutions… Or I think in the car, while taking a walk, during a boring show, etc. I now have a list of things I’d like to do, change, improve, learn, or quit; and whether I’ve written it down and taped it to my closet, typed it into my phone, or just thought about it over a long period of time until it is burned into my memory, the chances of me completing this list is as slim as ever.IMG_2200 (2)

But just for the heck of it, I will type them here for your viewing pleasure.

  1. Quit biting nails (this has been on my list since 1999… Has not changed. Sometimes after I get a manicure I manage to grow them out for a few weeks, but I rarely get manicures. Mostly because the old Asian woman who does my nails scolds me about bringing her bitten-down nubs to work with. It’s a vicious cycle.)
  2. Get in shape. (I know this is everyone else’s resolution as well, but since I’ve been living in Spain I’ve gained a significant amount of weight and can no longer wear my favorite jeans. So obviously something has to give. And that something is going to my waistline.)
  3. Bake more (This will probably cancel out all aforementioned efforts to get in shape.)
  4. Cook more while I am at home (that is, until mid-March. My mom works and while I am picking up a few babysitting jobs, I have 2 more months to kill while waiting for my visa to come through and I would like to spend it cooking in this kitchen. This resolution is off to a very good start, I might add. Mainly because my boyfriend and I became obsessed with Masterchef recently.)
  5. Don’t be so anxious about my health. (This is by far the most difficult thing for me. Since I was diagnosed with celiac disease over two years ago it has been hard for me to trust the medical community and have faith that they aren’t missing blatantly obvious symptoms of some other disease – like they did last time. But this is mostly on me and I need to start up yoga again and relax. This is why getting into shape is important for me this year – because it will help me get more in touch with my body as well.)
  6. Start being fiscally responsible and think like an adult (That is, have a plan, any plan, for my future and make one of my tedious google doc/excel spreadsheets about it.)
  7. Go to Italy (This kinda seems to cancel out number 6, I know, but my boyfriend and I cancelled a fabulous long weekend to Rome last year right after the Paris attacks. We’re still waiting until we both have the money and time off of work to go enjoy ourselves… So in a way, since I have to budget for this trip, it might actually reinforce my resolution to be more responsible with my money.)
  8. Throw things away. (This gets back to number 6 again, in a way. I never get rid of things – even if I know I’ll never use them again – because I paid money for them and I can’t bear to see it go to waste. What I need to do to avoid this is not only clean out and donate things, but also think more before buying new clothes, stationary, books, shoes, etc.)
  9. Write more. (Professionally, for myself, and on my blog.)


That’s it really. They’re simple enough and I have some down time these next few months to get my ducks in a row medically, financially, and mentally before heading back to Spain. For which I am grateful. This also means I have more time to bake and peruse the interwebs for inspiration, as well as my increasingly large library of cookbooks.

IMG_2172 (2)

(the dark spot in the center cookie is chocolate hazelnut butter. I wouldn’t recommend adding it.)

This recipe for flourless peanut butter cookies I got from the book Ovenly which is a gorgeous little book from a New York bakery that I found in the public library just the other week. I didn’t realize they had any gluten-free recipes, let alone this absolute gem. The upper corners of certain recipes are marker if they are gluten free or vegan, which is fantastic. (If you’re thinking about buying this book I should state that it is not their intention to bake only allergen-friendly goodies, they just happen to have some well-labeled, thoughtful recipes sprinkled through the book for us non-normal eaters.)

I was extremely skeptic about a flourless peanut butter cookie that literally has 4 ingredients and no chill time in the fridge, and was even more skeptical when I put the unappealing blobs into the oven. All I can say now is… Wow. This is one of the best cookies I’ve ever made and absolutely one of the easiest. The only downside is it takes almost a full jar of peanut butter to make, but it is worth it. The good thing about this though is that they suggest Skippy, so you don’t need to go out and buy an outrageously expensive jar of natural, organic, certified, vegan, nut-free, soy-free, gluten-free, refined-sugar free peanut butter made of ground up flowers and dirt. Yay! (*I would like to take this opportunity to say I am a big fan of Justin’s and Big Spoon natural and fresh ground nut-butters.)

IMG_2179 (2)

Without further ado, here is my first attempt at New Year’s Resolution #3: Bake More! (And win the powerball tomorrow night.)

Ingredients:

  • 1 ¾ c. light brown sugar
  • 2 large eggs, room temp.
  • ½ teaspoon vanilla extract (I always add a bit more)
  • 1 ¾ c. peanut butter (again, the NON-natural works better to help cookie maintain its shape)
  • Course sea salt for garnish

Directions:

  1. Preheat the oven to 350 degrees F and line a rimmed baking sheet with parchment paper.
  2. Whisk together the brown sugar and eggs until they make a homogenous mixture. Mix in the vanilla extract. Now add the peanut butter and mix with a spatula until you cannot see ribbons or clumps of peanut butter. It will make a thick dough.
  3. Scoop out the cookies into balls and drop on prepared baking sheet about 2 inches apart. Sprinkle the balls with course sea salt.
  4. Bake for 20-22 minutes (turning the pan halfway through this time) or until the cookies are lightly browned and crackled a bit on top.
  5. Let cookies cool completely and store in an airtight container for up to a week. (They won’t last that long. My mom and I got through 5 days but only because we rationed them like it was 1944.)


ENJOY!

Zaragoza Sin Gluten

IMG_1995 (2)

in front of Zaragoza’s Cathedral and Caesar Augustus Museum

View from the Basilica del Pilar’s tower; afternoon light inside

I knew when I decided to move to Spain that it wouldn’t all be sunshine and rainbows and jamón. I also knew due to my prior experience dealing with Spaniards (who are truly lovely but do not understand the meaning of “urgent” or “quickly”) that obtaining legal documentation to live here wouldn’t be a walk in the Parc [Guell]. But being mentally prepared for a sticky, not to mention infuriating, situation and actually living through it are two completely different things. I have started literally pulling my hairs out one by one and it’s gotten to the point that my boyfriend has to sit next to me and grab my hands when we’re watching tv or reading just so I won’t go bald.

I have absolutely nothing to complain about though because I am enduring this immigration-war-of-attrition (which is how I think of the situation between me and the Spanish Consulate in Washington DC at this point) from one of the most beautiful cities in the world – Barcelona.

IMG_2134 (2)

Pablo Serrano/Modern Art Museum

Even so, there comes a time when a girl just has to get out of town for the sake of her sanity, her boyfriend’s sanity, and her remaining hairs. This thinking led my boyfriend and I to plan two short weekend trips – one to Zaragoza, Spain and one to Rome, Italy. Our trip to Rome was scheduled for this weekend but given the current global situation – terrorist threats and worldwide travel warnings – we decided we didn’t want to travel to such a popular international city if we could go another time. Our trip to Zaragoza however was a few weeks ago and with all the stress, sadness, fear, and hatred in the world right now I figured this would be a good time to share some beautiful photos and peaceful thoughts from our one-night getaway to Zaragoza. (And also because I have lots of free time right now since I don’t have to pack for Rome and it’s the Spanish Consulate’s turn to make a move regarding my visa.)

IMG_2128 (2)

Details from inside Zaragoza’s Alfajeria Palace

We chose Zaragoza for a few simple reasons: Neither my boyfriend nor I had ever been there, the bus tickets were incredibly cheap, and the Basílica de Nuestra Señora del Pilar is there and it is one of Spain’s most beautiful churches, possibly even one of its most beautiful buildings.

Zaragoza is in the province of Aragón in the Northeastern part of Spain, and as my boyfriend was quick to point out, the people there have “weird accents” compared to Catalunya (honestly it’s all Spanish to me). Zaragoza is not considered a big tourist destination and apart from the attraction of the basilica I wouldn’t necessarily say it’s a particularly beautiful, but it was absolutely worth the visit. Like all cities it has its pros and cons and as we discovered in a fascinating (for me) exhibit at the modern art museum, the local government, city planners, and architects have done an incredible amount of work in the past decade to give the city a face lift and improve quality of life for its citizens. The exhibit was about the changing city fabric over time, but focused heavily on improvements made for the International Expo of 2008 held there. Again, Zaragoza is no Granada or Bilbao (two cities in Spain I adore), but this exhibition gave me a new appreciation for the city as we walked the streets.

Architecture (and weather!) mash-up

We also got incredibly lucky with the food there – for a city that lives on tapas and everything breaded, fried, or simply placed on top of bread, I ate some great gluten-free dishes. One of Spain’s easiest and oldest dishes is huevos rotos, or broken eggs, most commonly seen in the Canary Islands, but also enjoyed in different regions around Spain (I have not seen this in Catalunya as of yet). Potatoes are pan fried with jamón or mushrooms and at the last minute two sunny-side up eggs are broken over the top and served. In tapas bars with delicious and cheap wines, this plate was a life/night saver for me, if you know what I mean.

IMG_2062 (2)

We were also drawn to a restaurant that displayed its meat/carcasses in glass freezers at the entrance of the restaurant. While it may sound unappetizing or even morbid to some, my boyfriend and I loved the industrial feel and cool factor this provided. The waiter was also incredibly knowledgeable about celiac disease and informed me that almost anything I wanted could be prepared on a separate grill. And then he offered me “celiac bread” (which is what they call gluten-free bread here because no Spaniards other than the celiacs want gluten-free bread).

*Side note: The bread most restaurants serve when they say “celiac bread” is from a company called Airos. It comes in individual, oven-safe packets that include a list of ingredients and are then heated up. On several occasions my boyfriend has told me this oven-warmed Airos bread is better than what he is given and I must say I agree. While in general fresh bread in Spain is amazing, Airos can give more than a few bakeries a run for their money. It can also be found in local supermarkets (not the tiny mercados or “quick&easy” grocery stores) around Spain – for me this means my favorite Carrefour.

So it was here at La Lobera de Martín that we enjoyed huevos rotos with jamón yet again, only this time the waiter breaking the yolks open right in front of us. Everyone took great care of me and I felt very safe eating at la Lobera. Maybe even a little too safe – as I tried to take a bite of my boyfriend’s Argentinian cut beef (from the grill, so I assumed “it’s safe! YAY!”) our waiter happened to be walking by and said “stop! We did not cook that special for you!” Having been duly chastened, I returned to my own plate and mopped up every bit with my celiac bread.

Handsome man and our meal at La Lobera 

Another hidden gem for the gluten-free among us was 3 Lunas Taberna, which we chose for our first meal in Zaragoza mainly because there were empty tables and we were dying to sit down. Despite the lack of clientele, this restaurant served great arroz negro (literally “black rice” colored with squid ink) and simple yet delicious Spanish dishes. The staff here also took great care in preparing for me and making sure it was “okay” if they did my potatoes different from my boyfriends because they didn’t want to chance any cross-contamination. Oh, and we got two mini oven-warmed “celiac” baguettes for free since I couldn’t eat the “normal” bread that came with the €11 menú del dia.

IMG_2149

Zaragoza from above in 2008

All in all, we had a really nice gluten-free (and cold!) weekend. I think we both agreed that the best part was paying €3 to go up in one of the basilica’s towers… The view from the top was absolutely breath-taking (both figuratively and literally because I was panting a little due to my fear of heights). Our tapas crawl sprawled through the old town but it was centered around Calle Libertad, which is packed with Zaragozanos any given weekend. ¡Buen provecho!

48h Open House Barcelona

IMG_1779 (2)

Parabolic arches inside Colegio Teresiano

IMG_1619 (2)

details inside Casa del Baro de Quadras by Puig i Cadafalch

IMG_1639 (2) IMG_1629 (2)

For the past five years, 48hour Open House Barcelona has organized a weekend long architecture festival in the fall. For just two days in October over 150 buildings that are normally closed to the public participate in this event of portes obertes (open doors) and grant free entry to visitors. These buildings include the 125 year old school designed by Gaudí himself, an old Estrella Damm factory, water towers, buildings by Gaudí’s contemporaries such as Puig i Cadafalch and Domènech i Montaner, modern and luxury apartment buildings and hotels, architect’s offices, the terraces of the Gothic churches, and more. Last year I was oblivious to the fact that this event even existed so you can imagine my glee when I realized I could actually visit – for free – some of the most famous buildings in all Barcelona, let alone Spain.

IMG_1687 (2)

Colegio Teresianos

I planned my two days very carefully with a chart that included highlighted “must-sees”, checkmarks next to buildings I was interested in seeing, crossed-out sections of neighborhoods that were too far away to possibly get to, and little hearts next to buildings I had already visited. Needless to say, nearly the entire 3-page list of buildings (a list organized by neighborhood that is provided by the organizers) was highlighted in bright yellow. I started cross-checking the locations and opening times of each building (because every building has a different schedule, and unlike the name LED ME TO BELIEVE, they are not open the entire weekend) and made a very good itinerary.

IMG_1662 (2) IMG_1680 (2)

Details from the inside courtyard and facade of Palau Macaya, also by Puig i Cadafalch

With lists in hand, blank notebook, camera, and map in hand I set out on my weekend long tour of architecture that included – after all that planning – a grand total of four buildings. Yes, four. Just four. It turns out half of Catalunya was just as excited about the even as I was and most buildings has lines winding down the streets, turning corners, etc.

IMG_1859 (2)

Photos from Monasterio de Pedralbes; also part of 48 hour Open House Barcelona

IMG_1875 (2) IMG_1850 (2)

The important thing to take away from this is that life never goes according to plan, even when you use post-it notes and colored-coded pens. I did prioritize however and I made it to my #1 must-see for the weekend, the Colegio Teresiano designed by Gaudí.

IMG_1758

Parabolic arches in Colegio Teresiano

Located in the well-to-do neighborhood of Sarrià, this school is still in use today and known as the Col-legi Santa Teresa Granduxer to the students and local community. The outside of stone and brick work was impressive to be sure, but the Christian inscriptions which in English translate to “Jesus Christ Our Savior”, and four-sided crosses that adorned the rooftop are what gave this building away as one of Gaudí’s projects.

IMG_1789 (3) IMG_1706 (2)

Me inside Colegio Teresiano, and the front entry

If the outside is inspiring, then the inside is absolutely mind-blowing. We had to walk in silence through the halls (just like naughty students!) because the sisters who live and teach in the Teresian school still live in the building, just as they did in 1890 (presumably not the same sisters as back then). Spiraling brick columns and high windows and skylights, as well as the dozens of parabolic arches found in the upper story, give the massive building an overall sensation of lightness. The columns in the attic start to hint at a tree-like structure, a feeling of being in the woods, which is also on of the features that make the interior of the Sagrada Familia so breath-taking.

My boyfriend (who braved the 2 hour wait with me) and I both walked away from our short (Spanish) tour of this building in awe of the genius of the eccentric and unpopular (in his time) architect. I can not wait to see what next years list holds.

IMG_1735 (2)

IMG_1732 (2)

A trick of the light; Elevation of Colegio de les Teresianas (name in Catalan)

Stay tuned for more gluten-free travels and even more of my favorite buildings in Barcelona…!

Lisbon, Portugal – Part 2

IMG_1091 (2)

Basílica da Estrela

IMG_1012 (2) IMG_0975 (2)

Mosteiro dos Jerónimos

IMG_0996 (2)

IMG_0991 (2)

My best friend just sent me a message reminding me of something Ernest Hemingway used to say, “Write drunk, edit sober” and since I am home alone in a pueblo outside of Barcelona, I decided this was more of a command than a simple sharing of literary quotes. So here I am on my little Spanish foam rectangle (I’m really not sure what else to call it – “mattress” is too generous a word) with a small bottle of Jack Daniels and a carton of orange juice. I know it’s no glass of wine (which is how I imagine other people drinking alone) and you may raise your eyebrows in disgust or at least skepticism, but in a weird way it’s a reminder of home. Here in the land of wine, sangria, and gluten-free Estrella Damm Daura, drinking whiskey is almost like a trip to Starbucks, KFC, or the American Embassy (where I’ve also been, but more on that later).

IMG_1085 (2)  IMG_1177 (2)

Basílica da Estrela and a view of the Portuguese flag at Castelo de São Jorge

Needless to say, I don’t drink alone how I think you’re supposed to and I realized on my recent solo trip to Lisbon that I don’t travel alone the way you’re supposed to either. Once I start walking the morning I don’t really stop until I’m ready to pass out at 8pm. Aside from my detailed google docs about local museums, hotspots, historical sites, and restaurants, I also write down street names, directions, opening hours and admission costs of everywhere I want to go in a little notebook that I keep with me at all times. This obsessive planning could be a side-effect of celiac disease though; I always do research on how food is prepared in the country I am visiting, what’s my best bet for gluten-free food, how to pronouce various words related to my dietary needs, and where to find organic groceries (because organic stores usually also mean gluten-free jackpot). Whatever the root of this need to plan my every move in new cities, I always walk fast, with determination, and always, always in the wrong direction.

IMG_1192 (2)

IMG_1416 (2)

Museo Nacional de Arte Contemporáneo

IMG_1131 (2)

View of Lisbon from Castelo de São Jorge

So despite my copious amount of note-taking and preparing I always seem to spend half my time lost on public transportation or down side streets that I can’t locate anywhere on my map. Lisbon was no exception to this rule but I still managed to cover a lot of ground and even made it to a few free concerts and fell in love with Portuguese Fado music. Other than finding a concert during your travels in Lisbon, I would recommend the modern art museums in Lisbon, which were especially good, and the (free!) design museum located in the heart of the city. The tile museum was both a long trek and kind of a let down, while the castle was an uphill battle (literally) but absolutely worth it – even first thing in the morning. The cathedral is worth a quick look but in my opinion (and my Turkish roommate’s opinion as well) not nearly as impressive or awe-inspiring as Lisbon’s many monasteries, churches, and basilicas. As for eating gluten-free in Lisbon, I stuffed my favorite day bag full of Luna bars and prayed for the best but, just as in Spain, it turns out I didn’t have to worry.

IMG_1267 (2)

Monastery of São Vicente de Fora

IMG_1296 (2)

Tombs; Monastery of São Vicente de Fora

IMG_1363 (2)

Guess what’s for dinner? Silver display at the Museu Gulbenkian

Aside from copious amounts of cheese, cured meat, and olives available in the Iberian Peninsula, I’ve found that these countries (and much of Europe, really) take cooking and eating very, very seriously – which is both good and bad news for celiacs. It’s bad because they (be “they” French, Italian, Czech, Spanish, Irish, or German) enjoy nothing more than a warm croissant or a crusty, fresh-baked baguette and let me tell you, the smell alone is enough to make even the strongest-willed celiac crack (not that we do… because, you know, the next day would be awful).

The good news however, is that due to this passion for food, every chef, waiter, and barrista I’ve ever encountered has been able to tell me whether or not something I want to order either contains gluten or is prepared in a contaminated area. The “gluten-free diet” may be a foreign concept, but digestive and autoimmune diseases seem, to me at least, to be much more commonly understood than they are in the US. In America, if I say I have celiac disease, I get a blank stare from waiters until I explain I can only eat gluten-free foods. Here, it works the other way around. I spent my first month in Spain last year trying to explain I couldn’t eat gluten to very confused waiters until one of them finally said, “Oh! You mean your celiac?” In that moment I couldn’t help but thinking, man, these are my kind of people.

Between this collective knowledge of celiac disease, my knowledge of Portuguese that consists solely of “sem gluten” (gluten free) and “obrigado” (thank you), and these very helpful celiac dining cards, I never had any problems eating in Portugal. Breakfast can be the trickiest meal to sort out due to aforementioned love of fresh-baked gluten, but yogurt and eggs are always pretty easy to find. At lunch, I usually look for a hearty salad, and for dinner I’ve found that traditional dishes of meat, seafood, potatoes, etc. tend to be safe bets; they can easily be prepared without a gluten-containing sauce, as I’ve experienced many times.

IMG_1398 (2)

Loved the all white of this temporary exhibit in the Museo Nacional de Arte Contemporáneo

IMG_1018 (2)

Torre de Belém

If there’s one thing I’ve learned it’s to never be afraid or embarrassed to ask for help. I’ve only ever been met with politeness, great service, and good food in my travels and by double checking with waiters and even chefs about your food, you can avoid being ill for the rest of your trip. So go boldly my celiac friends, and travel your little hearts out!

IMG_1229 (2)

My favorite photo from Lisbon – taken somewhere near São Vicente de Fora

Lisbon, Portugal – Part 1

Aaaah Europe! Another year, another adventure, another gluten-free holiday before I buckle down and begin my job search in Barcelona. This short 3-day tour of Lisbon was different for me than all my other trips however for one notable reason: I was traveling alone… In a foreign country… For the first time ever. I mean, yes, I did master the Barcelona metro alone and go into the catacombs in Paris alone, but I always went confidently knowing that my friends, my study abroad program coordinators, and my wifi connection were all there to help if things got really desperate. This time it was just me, two incredibly heavy suitcases, two boxes of gluten-free Luna bars, and one sweet little Airbnb apartment located at the top of one very steep hill.

IMG_0956

To say my solo vacation got off to a rough start would be an understatement. After sleeping just 1 hour on my overnight flight from Boston to Lisbon, I found myself sitting in a Portuguese Starbucks with all my worldly belongings (or so it seemed) ready for the world’s longest siesta. I should mention at this point that although I love a good Pumpkin Spice Latte as much as the next American female, I was only at this Starbucks (instead of say, a historic café) for three very important reasons: I needed to use their wifi to contact my Airbnb host, it was located just inside the train station right near where I was staying, and I knew they had a bathroom. Just in case.

While I was waiting I contemplated my decision to move – jobless – to Spain and wondered vaguely why my stomach was hurting so much, assuming it was from the flight, jetlag, emotional turmoil, etc. But then I realized it was probably because I had forgotten to take my much needed acid reflux medicine, and in almost that same instant I ran to the “just-in-case-I-need-it-Starbucks-bathroom” bathroom, and threw up. Anyone who thinks being a celiac and living a gluten-free is boring has clearly never tried traveling with me.

IMG_0883 (2) IMG_0802 (2)

After receiving a message from my Airbnb host shortly after this incident, I took the most rejuvenating 3-hour nap of my life, ate some (gluten-free) quinoa salad I had bought at Starbucks, and finally, finally joined the wonderful world that is Portugal.

And it was AMAZING.

I went to Portugal for the first time last year on a short weekend trip to Porto and loved it almost as much as I love Spain. And sure enough, when I started walking around Lisbon for that first time that gorgeous day, I caught myself thinking that maybe I should’ve chosen this as the city to run away to. Then I overheard a couple speaking in Portuguese and the daydream ended. As beautiful as the language is (it sounds like Elvish to me), I had enough trouble learning Spanish and remembering which Catalan word meant “pull” and which meant “push”.

IMG_0799 (2)

So I decided to enjoy Lisbon for the next three days and see as much as possible, starting with Carmo Convent right outside my front door. Ruined by an earthquake in 1755, this medieval, roofless convent is Portugal’s answer to Tintern Abbey and a must-see for some unexpected beauty. My plan was to then wander through the streets of Lisbon but just one block over I got distracted by a bio grocer full of fresh produce, a café, and gluten-free goodies to stock up on for the weekend! With my assortment of breads tucked safely into my purse, I made my way down one of Lisbon’s 101284799 hills and found one of the city’s oldest and best gelaterias – Gelados Santini. With sour cream and pistachio scoops in hand (cup, no wafer cookies on top) I made my way back to my little bed to sleep before the long day I had planned.IMG_1329 (2)IMG_1111 (2)

The next morning began with yogurt from the bio grocery and a seeded gf roll with fresh cheese my Airbnb roommate so graciously offered me. First stop – Praça de Comércio, formerly known to me as “that pretty yellow building square in Lisbon”. From there I went to a nearby metro station to buy a transportation pass good for the trams, buses, and metros all day long for only €6,00. The plan for the day was to get lost in Belém and see some of Lisbon’s most well-known attractions while I was in the neighborhood.

IMG_1245 (2)

IMG_1096 (2)

I skipped the line first thing at the Jerónimos Monastery and headed instead to the Centro Cultural de Belém, home to the Museu Coleção Berardo. The museum itself is a very cool modern and contemporary art museum with free admission and the cultural center also has a modern rooftop garden and restaurant that overlook the Padrão dos Descobrimentos.

After my artsy morning I hiked uphill to the Palácio Nacional da Ajuda because it was highlighted in so many guidebooks and maps. Many of these helpful tourist guides forget to point out however that this palace was never finished, abandoned, and now houses… nothing other than a tiny “museum” of the incomplete building. And also a café that serves a very interesting Portuguese dish that was (hurray!) gluten free. I don’t know if it is always prepared gluten-free, but at the Palácio’s cafeteria I enjoyed a very cheap lunch of vegetables, fresh salad, and what appeared to be a kind of Shepard’s Pie prepared with salted cod in lieu of meat and potatoes and cheese in lieu of… well, everything else. All in all, my trip was going very well and my gluten-free discoveries just beginning!

IMG_0949 (2) IMG_0900 (2) IMG_0906 (2)

IMG_0940  IMG_0927 (2)

Gluten-Free Everything Bagels and “the List”

IMG_0141 (3)

Hello again, everyone!  I have been meaning to/wanting to write this post for months now, but after my fourth and most successful bagel-making attempt yet I figured I really should share my recipes and tips on how to make an incredible gluten-free bagel. So after months of work, travel, stress, college-graduating, job-hunting, teacher certification courses, etc. it’s finally time to get back to my blog and writing about one of the things I love most in the world – baking.

This is a fitting post for my reentry to the blogging world because one of the other things I love the most is bagels. Everything bagels, to be more exact. Especially if they’re from Bruegger’s Bagels and especially if they are toasted with butter, or filled with cheese, sausage and egg… Anyway, until four months ago when I braved the challenges of gluten-free bread baking (also known as chem lab for celiacs) I hadn’t had a bagel of any kind in over 14 months. Yes, I counted. And I think we can all agree that Glutino and Udi’s bagels, while edible if toasted and generously doused with butter, are not the same thing as fresh, warm bagels.

Some of you may not be as excited by bagels as I am, but if you can’t eat gluten I am sure you understand the sentiment and that you, too, have your own mental list of gluten-filled foods you’re going to eat the day second a cure for celiac disease is announced. My personal list goes like this: Chocolate croissants, toasted everything bagels, my mother’s scones, Walker’s shortbread, a crusty French baguette, a hot dog, brick oven pizza, cheese toast on real bread, pan con tomate, soft pretzels, garlic knots, fried chicken and waffles, and so on an so forth. You get the idea. It has also (tragically) occurred to me that a cure may not be discovered in my lifetime, so in lieu of a cure, I will also eat the contents of this list under the following conditions: if there is a zombie apocalypse, I am over 80 years old, I am diagnosed with a terminal illness, or if I am accidentally locked inside a French bakery for any amount of time. Needless to say, I’ve thought this subject over very carefully and more than I would care to admit.

IMG_0118 (3)

Now thanks to one of my favorite gluten-free cookbooks, Gluten-Free on a Shoestring Bakes Bread: (Biscuits, Bagels, Buns, and More) by Nicole Hunn, I don’t have to wait until the end of days to grab a bagel – and that, for me, makes this book worth its weight in gold. (If you don’t have gold bars lying around, it’s also about $15 on amazon.com.) While the bagel recipe is time consuming, it is technically easy and very well explained by the author. The trickiest part is rounding up the strange ingredients needed to make a gluten-free bread flour, a list of which is also provided and thoroughly explained by the author. Everything you need can be found in a local health foods store or in amazon’s grocery section, and while it might seem like a hassle, chances are if you’ve baked even one thing without gluten you’re already prepared for this. And trust me when I say you won’t regret the extra effort. There is nothing quite like making your own bread and if you successfully navigate gluten-free yeast-based breads you’ll be smiling for a week.

Without further ado, here is the recipe you’ve all been waiting for!

Basic Bread Flour Recipe (makes 1 cup, so you will need to do some multiplication here)

  • 100 grams all-purpose gluten-free flour (the author includes her own recipe for this and says it is based on BetterBatter.org’s recipe, so feel free to use that as well)
  • 25 grams unflavored whey protein isolate (NOT the vanilla smoothie protein!)
  • 15 grams Expandex modified tapioca starch

BAGELS

Starter:

  • 1 1/4 c. gluten-free read flour
  • 1 tsp. instant yeast (rapid rise)
  • 2 1/2 Tbsp. sugar
  • 1 c. warm water (95 – 100 degrees)

Dough:

  • 2 cups gluten-free flour, plus more for sprinkling
  • 2/3 tsp. instant yeast
  • 2 tsp. salt
  • Starter
  • Molasses bath for boiling bagels = 6 cups water, 1 Tbsp. molasses, 1 tsp. salt
  • Egg wash = 1 egg beaten with 1 Tbsp. water
  • Everything topping = Mix poppy seeds, sesame seeds, kosher salt, and dried minced onion to desired proportions

Directions:

  1. Start with the starter! Combine all starter ingredients in a bowl and whisk until well combined. Cover (I use a kitchen towel) and let sit in dry, warm spot until doubled – roughly 40 minutes. It will be thick and formless, don’t worry!
  2. After the starter has finished rising, place flour and yeast (from dough list of ingredients) in the bowl of a stand mixer and whisk to combine. Ass salt and whisk again. Add the starter to the bowl and mix on low speed with dough hook attachment to combine all the ingredients.
  3. HERE is where I had my troubles and got a really dense, chewy dough the first two times. I went straight to medium speed like the author describes once all the ingredients were well-combined, but in my stand mixer this meant all the dough became a rock attached to the dough hook. So I would suggest two things. First, grease the dough hook! This is a very sticky dough that is hard to work with. Next, beat on medium-low speed for 6 or 7 minutes rather than zooming up to medium strength.
  4. Lightly grease a large bowl or proofing bucket and do the same with a sheet of plastic wrap. Using a greased silicone spatula, scrape the dough into the prepared bowl and cover, greased side down, with the plastic wrap. Let sit at least 12 hours in the refrigerator or up to 5 days.
  5. Time to bake your bagels! Line a rimmed baking sheet with parchment paper and lightly spray with oil. Next, on a clean surface, roll out your dough and knead lightly. Separate into 6 parts and shape into a bagel. There are two ways to do this. The first is to make a snake and connect the ends. My preferred method is to make a ball on the counter and stick a floured thumb through the center to make a large hole.
  6. Cover the bagels on the prepared pan with plastic wrap and let stand another hour until doubled in size. I usually start the oven so the warmth helps the bagels rise. Your oven should be at 325 degrees.
  7. After the bagels have risen, boil the water, molasses and salt and drop one or two bagels in at a time, boiling for less than a minute on each side and then returning to the pan.
  8. Next lightly coat each bagel with the egg wash and topping of your choice. For me, it’s obviously going to be the everything blend! Bake for 20 minutes or until golden brown, let cool slightly, and enjoy!

*These bagels freeze well, so if you can’t eat 6 in 3 days like me, they’re great defrosted and toasted.

So that’s how you make a gluten-free bagel! Time intensive maybe, but oh so good. This should tide us all over until we’re cured forever, but in the meantime, you can find me drooling over my cookbooks, in front of bakery storefronts, watching Food Network, and oogling food photography on Instagram.IMG_0159 (2).

Banana Rum Cake

editedcake2

Two weeks ago I celebrated my 23rd birthday (and 2nd gluten-free birthday) with friends and family. My dad planned to cook us an incredible feast of chicken tikka masala and other Indian dishes (all gluten free of course!) while I agonized over what type of dessert I wanted to make. Nothing says “It’s My Birthday!” like an elaborate layer cake, but I’m not a huge fan of classic white, yellow or chocolate cakes, and vanilla and chocolate frostings are just too dull for words.

So what to make? My favorite cake to date was the banana cake with peanut butter buttercream layers, milk chocolate buttercream on top, and a dark chocolate ganache I made for my 21st birthday (the recipe is from “Baked Elements” if you’re interested. It’s a great recipe and an incredible book). That cake knocked everyone’s socks off and I thought that just maybe I could recreate a gluten-version of said world-rocking cake. But since I had already done the peanut-butter-banana combo I decided to jazz things up with some salted caramel buttercream and then add some rum to my cake batter to make a fancy adult version of the cake.

The recipe itself was relatively easy (I substituted my own gluten-free flour blend for AP flour) and the salted caramel buttercream was made with Stonewall Kitchen’s dark chocolate salted caramel sauce… so really the hardest part of this process was resisting the temptation to eat the entire cake myself. Mushed bananas and rum are fantastic ingredients when baking with gluten-free flours because the liquids help keep the cake from drying out both in the oven and during the following days of storage. It only lasted a few days in my house, but I am guessing it will keep for up to a week in the refrigerator. I only had one slice left to photograph when we were through devouring it if that gives you any idea of how good it was. Without any further ado – the recipe!

Ingredients: (original recipe here)

  • 3 cups gluten free flour
  • 2 tsp baking powder
  • 1 tsp baking soda
  • 1 tsp salt
  • 2 tsp ground cinnamon
  • 3/4 cup (stick and a half) unsalted butter, room temperature
  • 1 3/4 cup brown sugar, packed
  • 3 large eggs
  • 1/2 cup + 2 Tbsp buttermilk, room temperature
  • 3 – 4 large bananas, very ripe, mashed
  • 1/4 cup spiced rum

Directions:

  1. Preheat oven to 350 degrees F. Butter two 8-inch cake pans and line bottom with parchment paper (to do this, trace bottom of pan on parchment paper with pencil and cut out the circle). Use potato masher or something similar to mush the bananas in a large bowl. Set pans and bananas aside.
  2. In a large bowl mix together flour, baking powder, baking soda, salt and cinnamon. (Note* I always sift these ingredients together for a lighter batter but also to make sure any funny gluten-free flour clumps don’t get int there)
  3. In the bowl of your stand mixer fitted with a paddle attachment, cream butter until light and fluffy. Mix in the brown sugar and once combined add the eggs one at a time, making sure each egg is well incorporated before adding the next.
  4. Next, add 1/3 of the flour mixture and alternate buttermilk and flour into the mixer. Mix until almost combine. Repeat and end with the dry mixture.
  5. Add the mashed bananas and rum either by hand or on low speed until they look well blended.
  6. Divide cake batter evenly between the two prepared cake pans and bake for 30-35 minutes until toothpick inserted in center of cake comes out clean and cake springs back to touch. Let cakes cool in pan for 15 minutes before you run a knife around the edges and turn cakes out onto a cooling rack. Allow cake to cool to temperature.

Buttercream:

  • Beat together 2 sticks softened butter (salted or unsalted) and one 8 oz. package of softened cream cheese until soft and fluffy. Add 3 Tbsp. of rum, a teaspoon of vanilla extract, and a splash of milk. Now begin slowly blending in 3 cups of powdered sugar and your salted caramel sauce to taste. (The cream cheese helps prevent this buttercream from becoming sickeningly sweet.)

Assembly:

  • When cakes have cooled completely, level the top of each 8 in. cake before cutting it in half. A long serrated knife is best for this. When you have four thin layers, start by placing the first on your cake plate and smoothing 1/2 cup of buttercream over the top. Repeat until all layers are done. Next, create a “crumb coat” of buttercream but smoothing the frosting all over the outer edges and top of the cake. Place in fridge for thirty minutes. When cool, evenly spread the remainder of the buttercream over the crumb coat until it looks good. Decorate with sprinkles, more icing, caramel sauce, chocolate, candles, etc. And enjoy!

Oatmeal Banana Chip Muffins

DSC_0109 (2)

I love breakfast foods but when it comes time to actually prepare a real meal at o’dark thirty, I just don’t have it in me. I’ve never been accused of being a morning person and that being the case I stay in bed as long as humanly possible before dashing of to class or work. My breakfasts are either yogurt on the run or a gluten-free granola squished at the bottom of my bag… Not the most nutritious start to the day (but, all things considered, also not as bad as a McDonald’s drive-thru… so there!).

Anyway, I decided I really needed to remedy this situation and when we had some brown bananas wasting away on the counter I remembered a funny little muffin my roommate made once years ago. This “muffin” is naturally refined sugar-free and gluten-free and is super quick and easy to pull together. The recipe makes about 18 so you’ll have breakfast for over a week! (I usually eat 2 in the morning)

The original recipe is from this awesome blog, but I’ve also copied it below for convenience. Also, please ignore how ugly these little muffins are. Your taste buds won’t notice, don’t worry!

Ingredients:

  • 3 mashed bananas (browner the better for mashing and tastiness)
  • 1 cup milk (literally whatever kind ya got!)
  • 2 eggs
  • 1 Tbsp Baking powder
  • 3 cups Gluten-free Old Fashion or Rolled Oats (I use Bob’s Red Mill)
  • 1 tsp vanilla extract
  • 1/3 cup chocolate chips

Directions:

  1. Preheat the oven to 375 and spray muffin tins or muffin liners – this is important! The first time I made these I used muffin liners but did not spray the inside and the paper was impossible to get all the way off. So I had that extra fiber in my breakfast I guess…..
  2. Mix together all the ingredients except the chocolate chips and let sit for 10 minutes.
  3. Divide the batter evenly until 14-18 cups are almost full (they won’t rise much at all) and bake for 25 minutes  (checking and rotating halfway through) or until edges are starting to brown.
  4. Let cool before eating and store in fridge. Enjoy as you run out the door with coffee and healthy breakfast in hand!

DSC_0074 (2)

ugly little muffys, but pretty damn good!